

Everything you see - Made by Me
This project started as a result of me wanting to improve the ergonomic layout of my home desk space. Using a footrest under the desk has shown to reduce pressure on the body in ways which can alleviate back pain and poor circulation, providing a much more comfortable working experience.
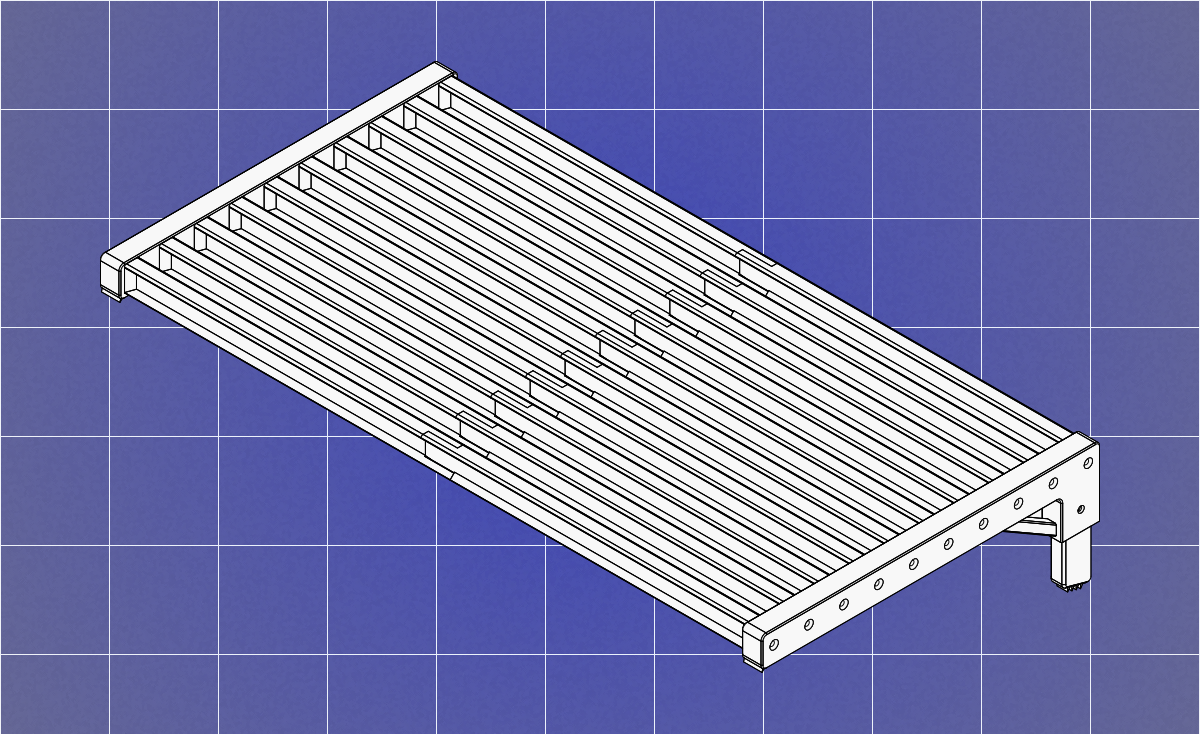
The end result I settled on was a very simple design that utilized a classic I-beam cross section to compose the primary foot surface, alongside basic L-shaped end pieces. My initial print used a partially rounded I-beam top, however I found this had issues with durability, so reprinted pieces use a sharp square profile instead.
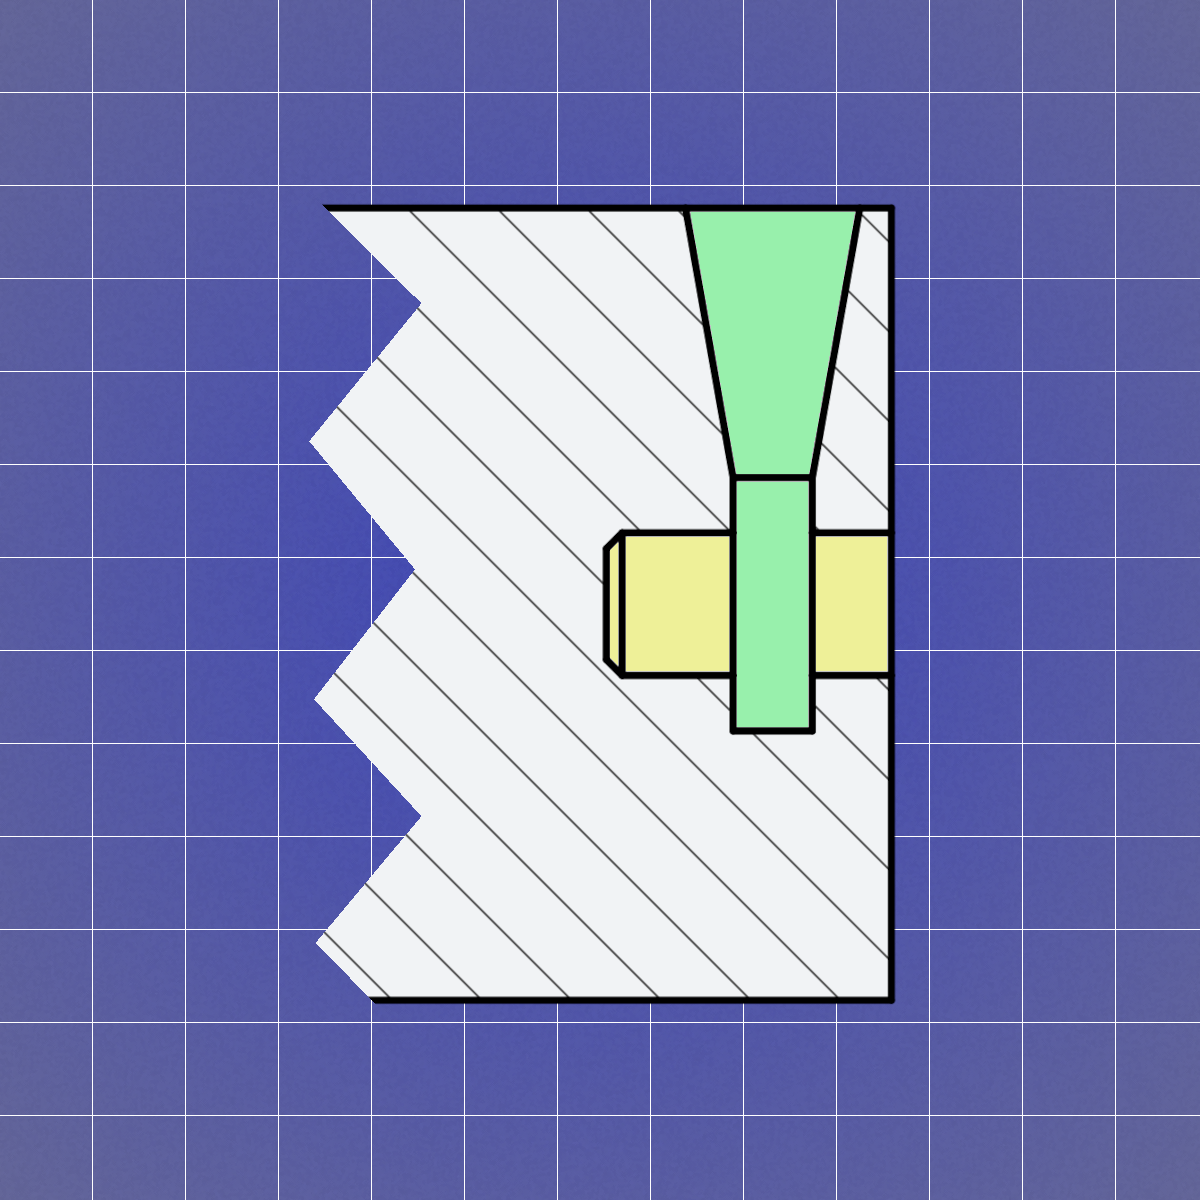
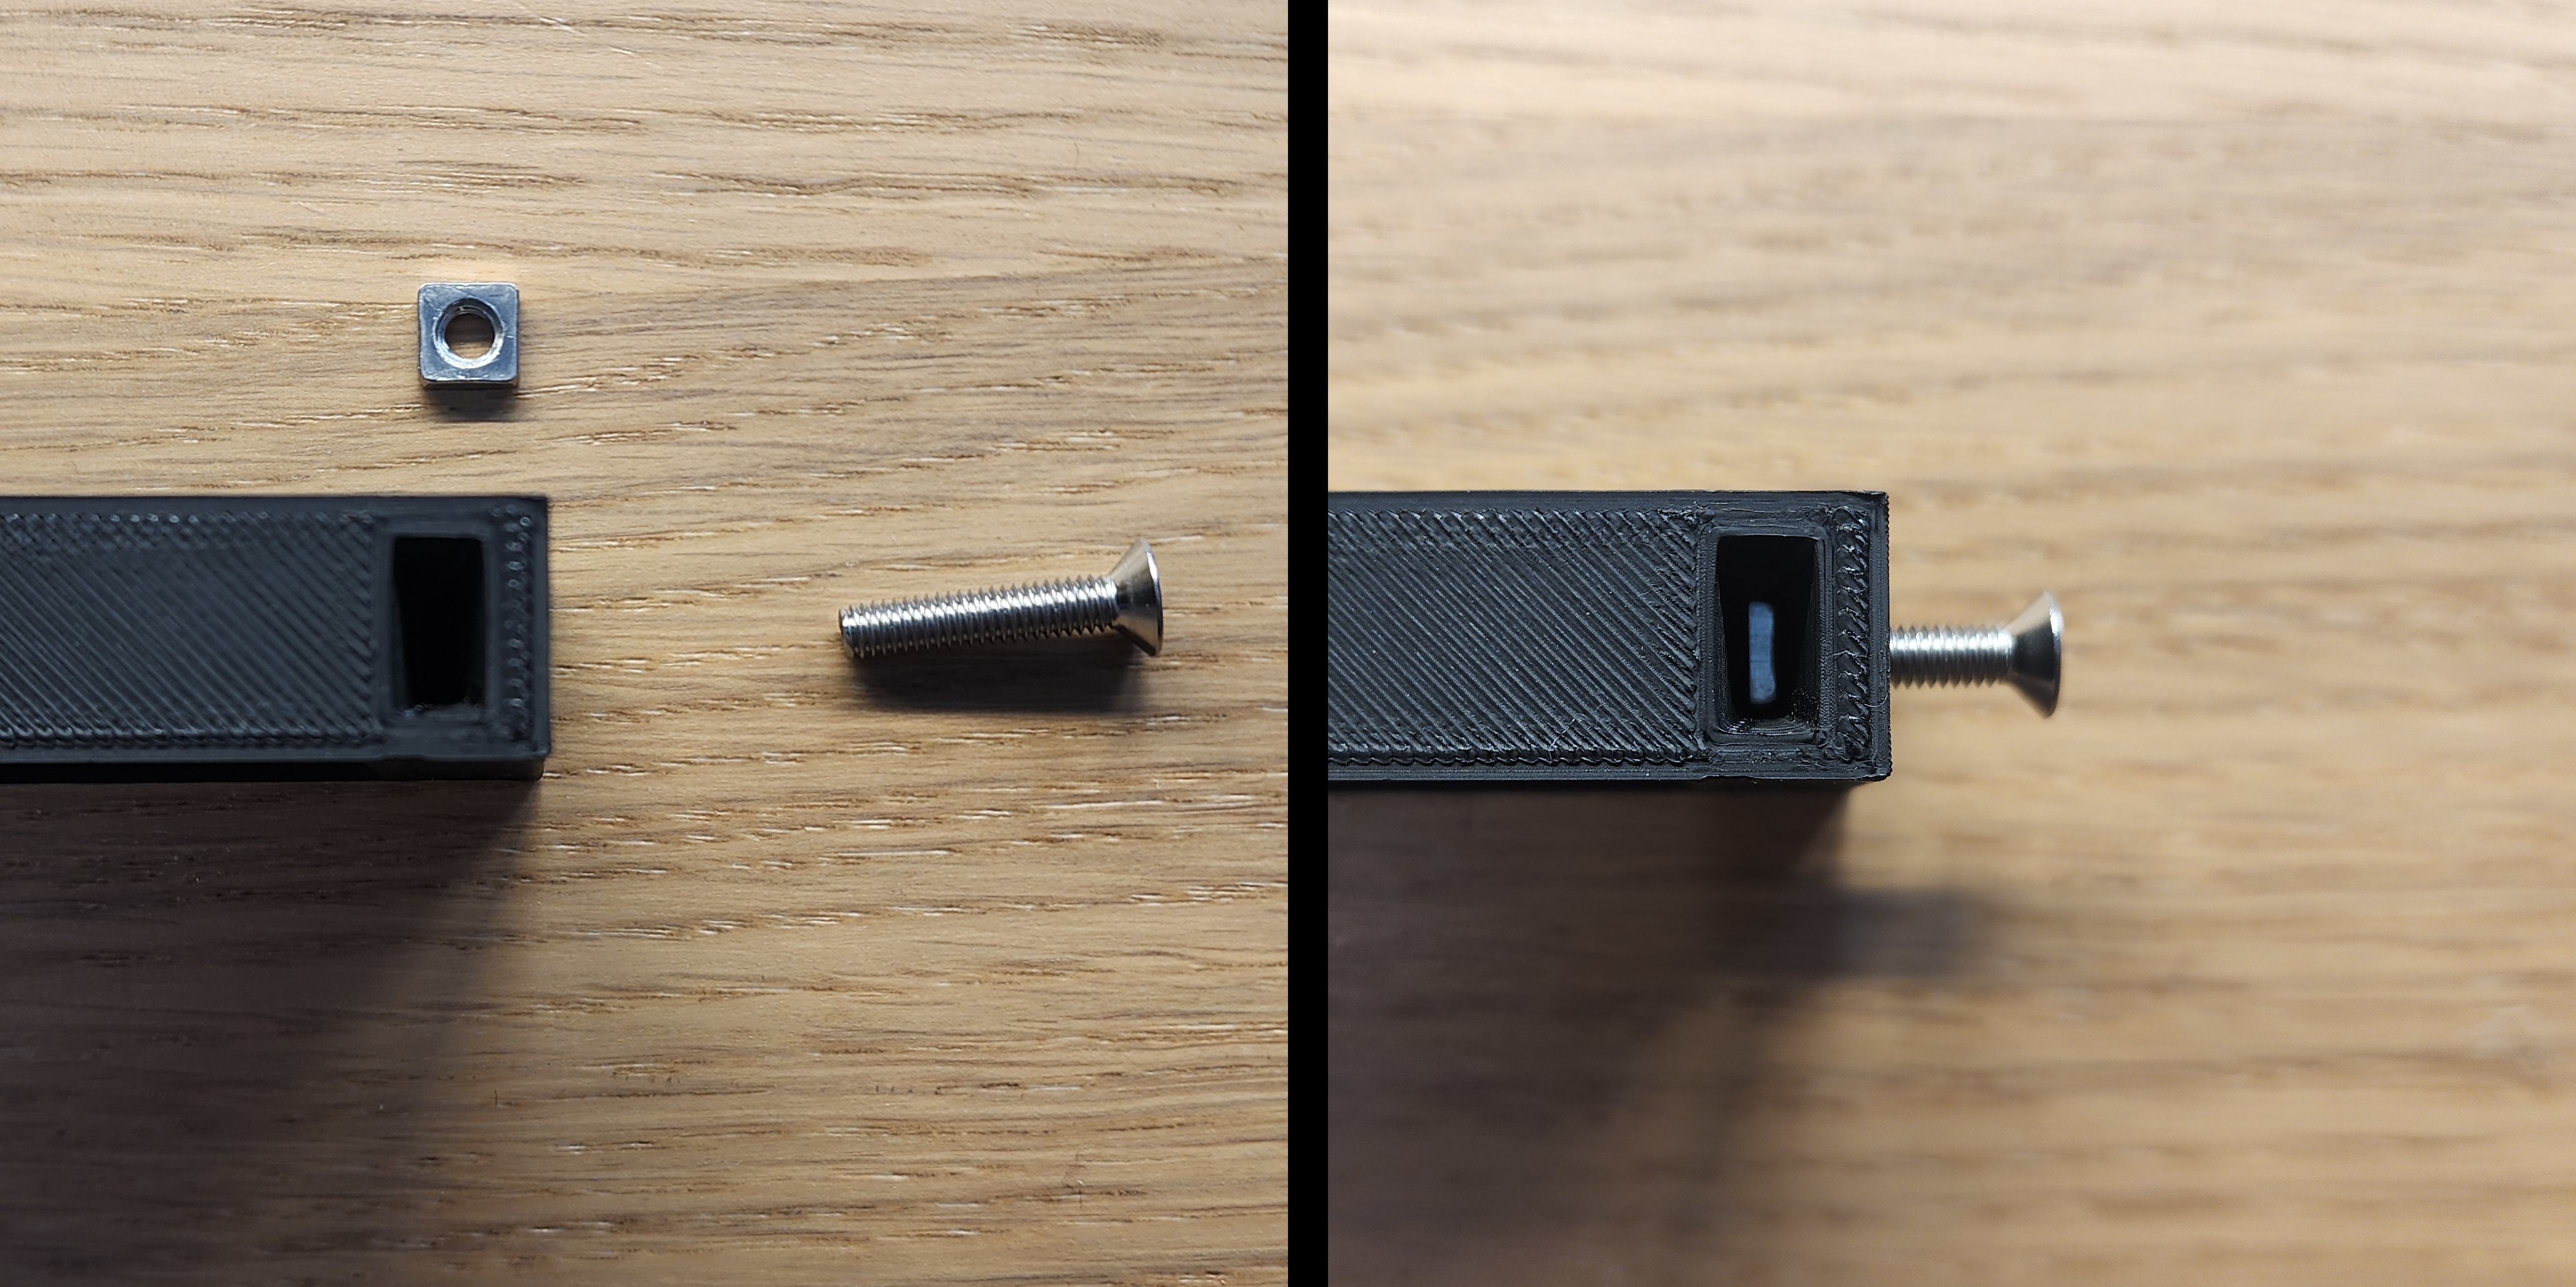
As can be seen in many of my designs using fasteners, I am quite fond of this reusable captive square nut design for joining multiple parts. In this case the insert is threaded for M4 screws, and uses countersunk bolts to give the final product a smooth, clean appearance. On the right (above, on mobile) you can see a cross-section of the nut insert design, and a picture of how eaily assembled the joint is.
Most of my prototyping focused on one key detail: the adhesive finger joint. My 3D printer has a maximum print size of 360mm cubed, so in order to create the spacious size of 680 x 349mm for the footrest, I needed to design a split in the middle of the I-beams. The split introduces a rather egregious stress concentration at a point in the footrest where the applied force is likely to be the highest. To remedy this, I created a finger joint, similar to what one uses in woodworking. By applying high-strength adhesive between the fingers prior to assembly, the resulting joint is strong and unlikely to break due to the high adhesive surface area inside the fingers. Shown below is a close-up view of the finger geometry. Here, the surfaces treated with adhesive are highlighted in red.
